How do you pick the best paintbrush for your project when many different kinds are available?
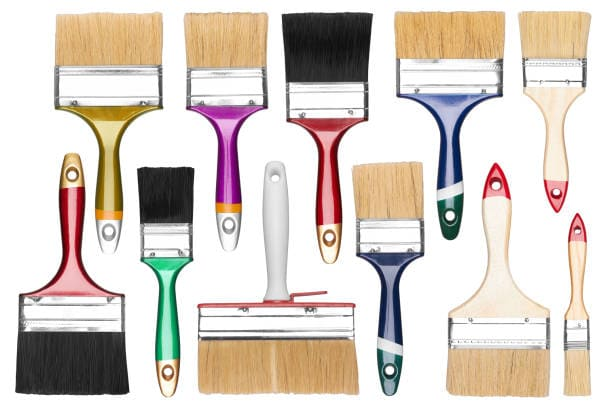
Choosing the correct paintbrush at your neighbourhood home centre, paint store, or hardware store can be difficult when faced with a dizzying selection of options. Be at ease! Here’s how to select the appropriate paintbrush among the various varieties for your job.
I was surprised to see so many different types—and sizes—of brushes available when I first went to my neighbourhood paint store to choose brushes to paint the walls of my guest room. Did I require the natural bristle, thin, angled brush? Or would a synthetic brush which is broader and more significant, do?
I quickly discovered that the kind of brush you require dramatically depends on your starting job.
Any DIYer working on a paint or stain job needs a variety of high-quality brushes,
A high-quality brush may make projects look even more professional because the quality of the paint applicator has a significant impact on the finished product. How, then, do you pick the best one? Here, the experts who know it best explain everything to you.
Success or Failure Depends on the Paintbrush You Use
The brush or roller cover you select will be one of the essential elements influencing the outcome—for better or worse—of any painting project you undertake. Your efforts will be wasted, and you’ll be disappointed with the outcome if you choose the wrong tool. In contrast, every step of the process will go more smoothly, and there will be a greater possibility that the finished product will seem professional if you have the correct tool. In this article, I’ll go into great detail on brushes.
How to Select the Right Brush for Your Project?
Choosing the right brush always depends on your paint project, such as a brush that gives a smooth finish, has the best bristles, and has the perfect size, style, shape, and quality material. Yes, the paintbrush having all these attributes will be your best paint companion!
In light of this, let’s examine the primary standards for selecting a brush. The first option is size, which includes the overall breadth and length of the brush as well as the percentage of the bristle length to the entire length.
The type of bristles and their shape will be discussed next. This is the element that, if disregarded, could spell the end of your painting endeavour. Finally, we’ll address price and whether it makes sense to get a more expensive, higher-quality brush or to settle for the least expensive one that will still get the job done. Before we wrap up this discussion, I’ll also advise you on how to care for, store, and reuse brushes.
Main Parts of The Paint Brush
- The handle is typically rounded or contoured to fit into a human hand and can be made of wood, plastic or rubber plastic.
- The bristles can be formed of synthetic or natural fibres, with a straight or angled cut at the end (known as the brush’s toe). The ferrule—the metal piece connecting the bristles to the handle—and the portion of the bristles from midway down are referred to as the belly. Never put paint into the belly of a brush while loading it; always put paint on the lower half of the bristles.
- The ferrule portion closest to the bristles, known as the heel, is often made of thin metal.
Consider Brush Material
The best paints with natural bristle brushes are all urethane, enamel, and oil-based stains and varnishes. They are more expensive than brushes made of synthetic fibres. Synthetic fibre is the ideal bristle type for modern acrylic, latex, and alkyl paints. The flagging or splitting at the tips of the natural bristle brush helps provide a smooth finish and holds a lot of paint. Because natural bristle brushes are more challenging and can withstand the chemicals better, they are more suited to oil-based paints and allow you to apply the paint without leaving a mark.
For water-based paint, synthetic brushes work best since they don’t suck moisture out of the paint, making it easier to apply than with a natural bristle brush and preventing tramlines from ruining your finish. Synthetic brushes come in various materials, including nylon, polyester, and a combination. They are simple to use and easy to clean.
Cheap foam brushes are typically only used for fast tasks—touchups, for instance—and are not usually worth the time it takes to clean them thoroughly. They are thus a fantastic alternative to pricey natural bristle brushes for minor applications that would otherwise require them. Applying test patches of paint is another useful application for foam brushers. If you buy a pot of test paint, buy a few foam brushes simultaneously because you’ll save time by not needing to clean a brush you’ve used for a short while.
Just keep in mind that if you apply the finish coat on stained wood, you cannot achieve the same smooth, glossy finish with a foam brush as you can with a natural bristle brush. If you are covering a broad area, don’t expect a foam brush to last very long because stains and other thin paints can eat the foam away. Even though a natural bristle brush is significantly more expensive, use it instead. Your time is valuable, too, and investing time in a project if you aren’t using the right resources is not cost-effective. You can find yourself needing to start from scratch or being dissatisfied with the outcome.
Stiff Brushes vs Soft Brushes
Beyond the substance from which they are created, bristles differ in how soft or stiff they are. On its box, brushes are identified as being soft or stiff.
Natural Bristle Brushes / Natural Bristle Brush
Stains and varnishes work best with softer bristles. The primary reason natural bristles are suggested for varnishes, urethanes, and oil-based paints, in general, is the relative softness of natural versus synthetic bristles.
If stiff bristles are used to apply the paint, the result will be brush ridges that are noticeable and unpleasant. To have more control over the paint, you will need a stiffer brush if you paint delicate moulding or cutting around the trim. To cover broad, plain surfaces, use a softer brush and a stiffer one for those jobs.
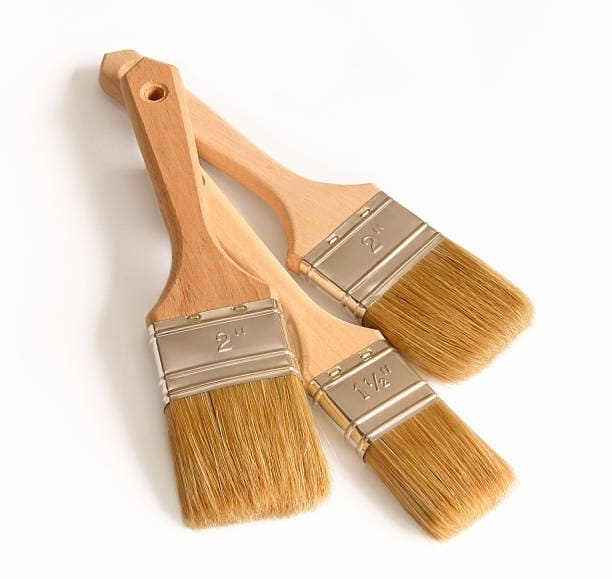
How to Choose the Right Brush Size
Now that you’ve decided on the bristle choose the size. The width of the bristle area and the thickness of the bristles impact how well-suited your brush is for a specific job. You must match your brush to the surface you’re painting because thicker brushes offer more control, while thinner brushes are lighter and allow you to cover more ground before needing to reload.
Select a brush that is wide enough to cover an area well and narrow enough to control how much paint is applied. A large brush doesn’t work well when painting a small area because you won’t have much control over where the paint goes. A 2-2.5 inch brush works well for cutting in, but a 1-inch brush works best when painting doors or skirting boards. A 5-inch brush works best for large, flat surfaces like walls and ceilings so that you can cover the surface faster. These are the most common types you will find in all stores.
1- to 1.5-inch (angled or straight)
2- to 2.5-inch (angled or straight)
3- to 4-inch (straight)
While a more significant brush retains more paint and completes the task more quickly, a smaller brush is easier to manipulate. DIYers should use a 1.5- to 2-inch brush for cutting in on interior walls, while a 3- or 4-inch brush should be used when covering a larger surface, such as staining a deck or painting exterior siding.
Additionally, whether you’re painting anything for fun or a craft project, smaller brushes are what you’ll want to use. Your level of precision will decrease as the brush width increases. The customer can choose between an angled and flat brush shape. Most do-it-yourselfers discover that an angled brush makes cutting in easier while a flat brush makes painting trim and other smooth surfaces easier.
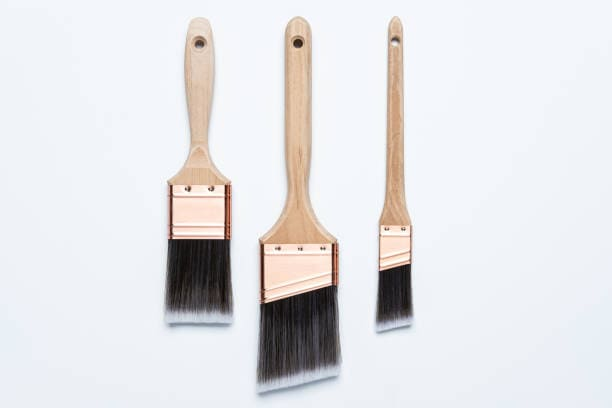
How to Choose Brush Shape
Now that you know the type and size of the bristles, how about the shape? Depending on what you need to paint, you can choose between angled and flat paint brushes. Angled brushes are effective for cutting along edges and obtaining straight lines. A thicker angled brush holds more paint and works nicely along ceilings, while a thin angled brush is perfect when you require a sharp line. A flat brush will be necessary to paint a sizable, flat surface to complete the task quickly and effectively.
Also, remember that how well the paintbrush picks up paint and applies it to the painted surface depends on the bristle ends. Hairs that have flagged or exploded on higher-end brushes allow you to pick up more paint with each dip. Spending more on your brush up front may save you time in the long run because the split also aids in smooth paint application without brush strokes.
Best Paint Brushes Style
Square Cut:
For large, flat surfaces, both indoors and outside, a 4- to 6-inch square-cut wall brush is appropriate. Use a sizable wall brush to paint walls, flat doors, and siding. You won’t need rollers if you use a high-quality wall brush, and since brushes are more accurate, you might even save money on paint.
Angle Sash:
This brush was made specifically for painting window sashes, which slide up and down inside the window frame. However, because of its small handle and superb stability, this angle, the short-handled brush is suitable for a range of detail work. Use it to paint panels, edges, corners, and grooves and get around obstructions like a toilet.
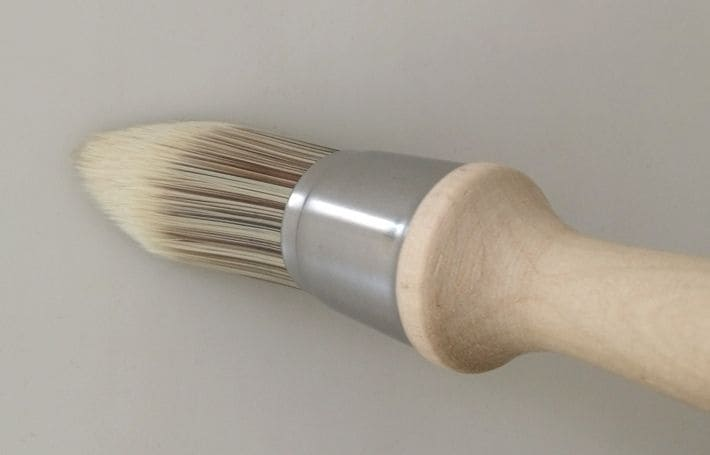
Round Sash:
Sizes for these smaller brushes range from 20 to 40 mm. The circular configuration of the bristles makes them the ideal paint brushes for decorative painting (such as faux finishes) and furniture, such as chairs and table legs.
Spend ON Quality Brushes
Cost is a subjective concept. Having a professional do the job would cost much more, so consider the tools you use for Do It Yourself projects as a wise investment and set aside money accordingly. Yes, high-quality brushes will cost more than standard-grade brushes.
On the other hand, there are many occasions when using the cheapest brush possible will suffice. These include quick touchup jobs and small jobs that don’t require a high level of finish. Applying deck stain and sealant is another project that might benefit from using a cheap brush; look for broad, affordable brushes explicitly designed for this purpose. Therefore, do not be ashamed to purchase and use inexpensive and disposable brushes, but do not be afraid to invest in a high-quality brush when doing a project you want to be proud of. But for most projects, you’ll be happy you spent more money on a good paintbrush. Better brushes last longer, apply paint more evenly, hold more, and may be simpler to clean. The simplest way to judge quality is by price. A high-quality brush should cost between $10 and $20.
To Extend the Life of Brushes, Clean them after Each Usage.
Use dish soap and warm—not hot!—water to thoroughly clean brushes after each water-based project. Work the bristles with your hand, pointing them down until the water is clear. After a few shakes to straighten the bristles, hang the brush to dry. When your brushes are dry, please keep them in the sleeves they came in to keep the bristles flat and safeguarded. If you’re using oil-based paint, swirl the brush for 30 seconds in a cup of paint or lacquer thinner before wiping it on the cup’s side. Until now, paint comes from the brush, and you probably need to repeat this step a few times. After that, wash the brush with soap and water, shake it out, let it dry, and then put it in the sleeve it came in.
No paint should ever be loaded onto the belly of the brush when painting correctly. Paint should only be present on the latter half of the bristles. Cleaning as high up into the bristle as you can is essential since, in reality, it is practically difficult to avoid having some paint driven upward into the belly. While rinsing, press the brush firmly against a surface to get the bristles to spread out. To get rid of any paint that has been caked on, rub the bristles with a sponge with a light-scrubbing surface. Then repeat the rinsing.
Start Your Paint Brush Collection With Paintbrusha
You’ll eventually want a brush collection to have the ideal brush for any situation. We advise a 2-1/2-inch-wide, angled brush with Chinex bristles if you’re starting and want a general-purpose brush that can be used for painting, trimming or cutting in a space. While small enough for precision control, this brush size retains a sizable amount of paint. Start with a 2-inch-wide brush if you need to develop your brushing techniques or are a beginner.
A high-quality paintbrush is usually always worth the extra money be you use it in latex paint. Your brush should last a very long time if you treat it right. An excellent paintbrush holds paint well and is simple to clean without losing its original shape. A good paintbrush should most significantly be comfortable and straightforward to wield. A paintbrush will only be worthwhile to buy and use when it possesses all these characteristics.
In particular, expensive paintbrushes are unquestionably worthwhile if you are a beginner painter. They are not only a wise purchase given how long they last, but painting with them will also be more enjoyable.
For the most excellent results, pay close attention to the construction quality of the paintbrush you choose.
When testing a paintbrush, look for dense bristles and bend it back toward the base; a sturdy paintbrush will spring back.
You may achieve a smooth, high-quality surface finish using the right brush. But remember that preparation is the key to successful decoration, so do your homework and set up your canvas before you start painting!