Painting walls and ceilings are one of the most accessible and affordable ways to transform the look of any room in your home. Whether painting a new home or freshening up a tired space, several tips and tricks can help make the job easier and ensure a professional-looking finish.

In this article, we’ll cover everything you need to know to paint walls and ceilings like a pro, from choosing the right tools and materials to prepping your surfaces and applying the paint.
Choosing the Right Tools and Materials
Before you start painting, it’s essential to have the right tools and materials on hand. Here are some of the essentials you’ll need:

Paint
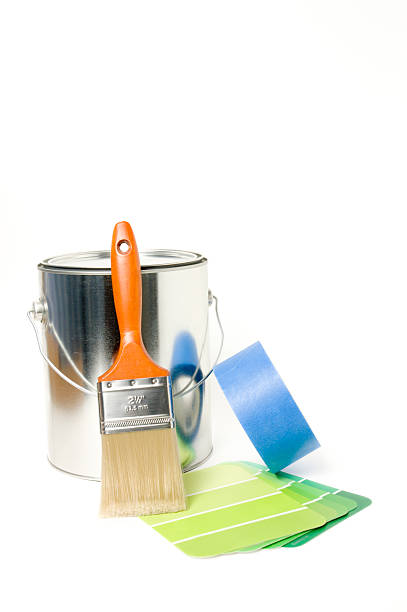
There are many types of paint to choose from, including oil-based and water-based, gloss and matte finishes, and various colours. Consider the type of room you’re painting, the amount of natural light it gets, and your style when selecting your paint.
Brushes and Rollers

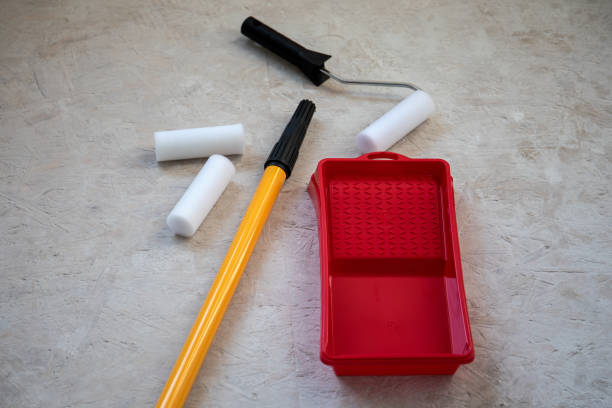
You’ll need a variety of brushes and rollers to paint different areas of the walls and ceilings. Choose high-quality brushes and rollers appropriate for the type of paint you’re using.
Paint Trays and Liners

Paint trays and liners are essential for holding the paint and keeping your work area clean. Choose trays and liners that are appropriately sized for your brushes and rollers.
Drop Cloths
Protect your floors and furniture by using drop cloths to cover the area you’ll be painting.
Painter’s Tape

Painter’s tape is a must-have for creating clean lines and edges. Choose a high-quality tape that won’t damage your surfaces or leave residue behind.
Prepping Your Surfaces
Prepping your surfaces is critical to achieving a smooth, even finish. Here are the steps you’ll need to take:
Clean the Surfaces
Before painting, clean your walls and ceilings thoroughly to remove any dirt, dust, or grease. Use a damp cloth or sponge and mild detergent to clean the surfaces. Be sure to let them dry completely before painting.
Repair Any Damage
Inspect your surfaces for holes, cracks, or other damage. Fill in any holes or cracks with spackling paste or putty, and smooth the area once dry. Use caulk to fill gaps or cracks around windows, doors, or trim.
Tape off Areas
Use painter’s tape to remove areas you don’t want to paint, such as baseboards, windows, and doors.
Prime the Surfaces
If you’re painting over a dark or heavily textured surface or using a new colour, consider priming your surfaces before painting. Primer helps the paint adhere better and provides a more even finish.
Applying the Paint
Once your surfaces are ready, it’s time to start painting. Here are some tips for applying paint:
Start with the Ceiling
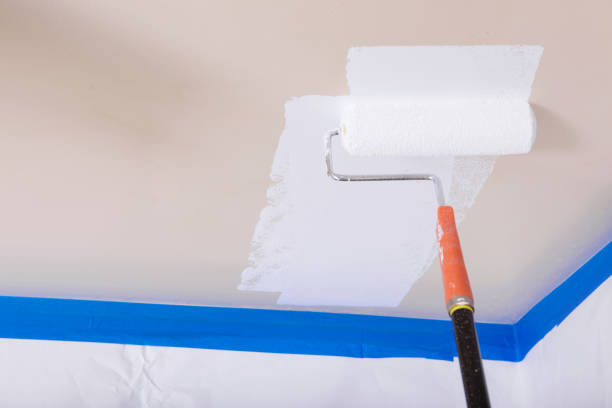
Begin by painting the ceiling, using a roller to apply the paint in a “W” shape. Start at one end of the room and work across, painting in small sections. Be sure to overlap your strokes to ensure even coverage.
Paint the Walls
Once the ceiling is dry, it’s time to paint the walls. Use a brush to cut around the room’s edges, then use a roller to apply the paint in sections, working from top to bottom. Roll the paint on in a “W” shape, and overlap your strokes for even coverage.
Keep a Wet Edge
Keep a “wet edge” as you paint to avoid visible brush or roller marks. This means working in sections and keeping the paint wet as you move across the surface. Start at one end of the section and work across, applying the paint in a “W” shape. As you move to the next section, be sure to overlap your strokes with the previous section while the paint is still wet.
Apply Multiple Coats:
Depending on the colour and type of paint you’re using, you may need multiple coats to achieve full coverage. Allow each coat to dry completely before applying the next.
Use a Paint Additive:
If you’re painting in a high-humidity environment or if you’re painting with glossy paint that tends to dry quickly, consider using a paint additive to slow down the drying time. This will give you more time to work with the paint and achieve a smooth finish.
Clean Up

Once you’re finished painting, cleaning up properly to maintain your tools and surfaces is essential. Here are some tips for cleaning up:
Clean Your Tools
Use soap and warm water to clean your brushes, rollers, and paint trays. Rinse them thoroughly and allow them to dry completely before storing them.
Remove Painter’s Tape
Remove the painter’s tape while the paint is still wet to avoid pulling off any dried paint with it. Use a sharp utility knife to cut along the edge of the tape before pulling it off.
Touch Up as Needed
Once the paint is dry, inspect your surfaces for any areas that need touch-ups. Use a small brush to touch up any spots that need it.
Painting walls and ceilings can be daunting, but with the right tools, materials, and techniques, it’s a job that anyone can tackle. By prepping your surfaces properly, applying the paint correctly, and cleaning up afterwards, you can achieve a professional-looking finish that will transform any room in your home. Remember to take your time, follow the steps, and enjoy the process.
Additional Tips and Tricks
In addition to the tips outlined above, here are some additional tips and tricks to help you paint walls and ceilings like a pro:

- Use a paint pole: If you’re painting a ceiling or high walls, consider using a paint pole to help you reach the higher areas without climbing a ladder.
- Use a high-quality paintbrush: A high-quality paintbrush will help you achieve a smoother, more even finish. Look for brushes made with natural bristles, as these tend to hold more paint and distribute it more evenly.
- Don’t overload your roller: Overloading your roller with paint can result in drips and splatters, so only apply a moderate amount of paint to your roller.
- Use a paint shield: A paint shield is a helpful tool for creating clean edges and preventing paint from getting onto areas you don’t want it to. Hold the shield against the surface you want to protect, and use a brush or roller to paint up to the shield’s edge.
- Don’t forget the edges: When painting a wall, paint the edges and corners first before moving on to the larger areas. This will help you avoid leaving brush or roller marks along the edges.
- Paint in natural light: Painting in natural light will help you see the paint’s actual colour and avoid any colour discrepancies that can occur in artificial light.
- Be patient: Painting walls and ceilings requires patience and attention to detail. Take your time, and don’t rush the job; this can result in a sloppy finish.
Painting walls and ceilings can be a rewarding DIY project that can give your home a fresh new look. By following these tips and tricks, you can achieve a professional-looking finish that will transform the look of any room in your home. Whether a seasoned DIYer or a beginner, you can achieve a flawless finish with the right tools, materials, and techniques.
Common Mistakes to Avoid
While there are many tips and tricks for painting walls and ceilings, you should avoid some common mistakes. Here are a few mistakes to watch out for:
- Not prepping the surface properly: Skipping the surface prep can result in a messy, uneven finish. Be sure to clean and prime the surface before painting to ensure that the paint adheres properly and the finish is smooth.
- Using low-quality tools: Using low-quality tools like brushes, rollers, or paint can result in a shoddy finish. Invest in high-quality tools and materials to achieve the best possible results.
- Not using enough paint: Applying too little paint can create an uneven, patchy finish. Apply enough paint to achieve full coverage, but be careful not to overload your roller or brush.
- Painting in the wrong conditions: Painting in extreme temperatures or high humidity can result in paint that doesn’t dry properly or bubbles and cracks. Be sure to paint in the right conditions to avoid these issues.
- Not allowing enough drying time: Rushing the job and not allowing enough drying time between coats can result in a messy, uneven finish. Be patient and allow each coat to dry completely before applying the next.
By avoiding these common mistakes and following the tips and tricks outlined above, you can achieve a professional-looking finish that will transform the look of your walls and ceilings.
Painting walls and ceilings can be a fun and rewarding DIY project, but it’s essential to approach it with the right tools, materials, and techniques. By prepping your surfaces properly, using high-quality tools and materials, and following the proper steps, you can achieve a flawless finish that will make your home look brand new. Don’t be afraid to experiment with different colours and techniques, and remember to take your time and have fun with the process. Happy painting!
Choosing the Right Paint

Choosing the right paint is an essential step in achieving a professional-looking finish. Here are some factors to consider when selecting paint for your walls and ceilings:
- Type of paint: There are many different types of paint, including latex, oil-based, and acrylic. Each type of paint has its advantages and disadvantages, so consider the specific needs of your project when selecting paint.
- Sheen: The sheen of paint refers to glossiness or shininess. Standard sheens include flat, matte, eggshell, satin, semi-gloss, and high-gloss. Consider the look you’re trying to achieve and the durability you need when selecting a sheen.
- Colour: The colour of your paint is an essential factor to consider. Consider the other elements in the room, such as furniture, flooring, and accessories, when selecting a colour. It’s also a good idea to test the colour in the room before committing to a large area.
- Coverage: Different paints have different coverage rates, which refers to how much surface area can be covered with a certain amount of paint. Consider the size of the area you’re painting and the coverage rate of the paint when selecting paint.
- Quality: Quality is an important factor to consider when selecting paint. High-quality paints are more durable, have better coverage, and have a smoother finish. While they may be more expensive, they can be worth the investment in the long run.
Prepping the Surface
Properly prepping the surface is a crucial step in achieving a professional-looking finish. Here are the steps you should take to prep your walls and ceilings before painting:
- Clean the surface: Before painting, clean the surface thoroughly to remove any dirt, dust, or debris. Use a mild detergent and water, and allow the surface to dry completely before painting.
- Repair any damage: If holes, cracks, or other damage on the surface, repair them before painting. Use spackle or joint compound to fill in any holes, and sand the surface smoothly once it’s dry.
- Sand the surface: Sanding the surface can help the paint adhere better and achieve a smoother finish. Use fine-grit sandpaper and lightly sand the surface until it feels smooth.
- Prime the surface: Priming the surface before painting can help the paint adhere better, cover stains, and result in a smoother finish. Use a high-quality primer and apply it evenly with a brush or roller. Allow the primer to dry completely before painting.
Applying the Paint
Once you’ve prepped the surface properly, it’s time to apply the paint. Here are some tips for applying paint to your walls and ceilings:
- Use the right tools: Using the right tools can make a big difference in the quality of the finish. Use high-quality brushes, rollers, and paint trays for the best results.
- Cut in first: Cutting in refers to painting the edges and corners of the surface before painting the larger areas. This can help you avoid leaving brush or roller marks along the edges.
- Use the W technique: When painting more extensive areas, use the W technique. Start at the top of the surface and paint a W shape, then fill it in with vertical strokes. For the next section, overlap your strokes with the previous section while the paint is still wet.
- Apply multiple coats: Depending on the colour and type of paint, you may need to apply multiple coats to achieve full coverage. Allow each coat to dry completely before applying the next.
- Use a paint additive: If you’re painting in a high-humidity environment or if you’re painting with glossy paint.
- Don’t overload the brush or roller: When applying paint, it’s important not to overload it. This can result in drips and an uneven finish. Instead, dip the brush or roller in the paint, then tap off the excess before applying it to the surface.
- Keep a wet edge: When painting more extensive areas, it’s essential to keep a wet edge to avoid visible seams or lines. This means continuously painting from one side of the surface to the other without stopping or starting in the middle.
- Take breaks: Painting can be physically demanding, so taking breaks as needed is essential. This can help you avoid fatigue and maintain a steady hand while painting.
Finishing Touches
After you’ve applied the final coat of paint, there are a few finishing touches you can do to ensure a professional-looking finish:
- Remove tape: If you used tape to protect areas you didn’t want to paint, remove it while the paint is still wet to avoid peeling or tearing the paint.
- Touch up any mistakes: Once the paint has dried, closely examine the surface to identify any mistakes or missed areas. Use a small brush to touch up any mistakes or missed areas.
- Clean up: Properly cleaning up your tools and supplies after painting can help prolong their lifespan and ensure they’re ready to use for your next project. Clean your brushes and rollers thoroughly with soap and water, and store them in a dry place.
Conclusion
Painting walls and ceilings can be a rewarding DIY project that can transform the look of your home. By choosing the right paint, prepping the surface properly, applying the paint correctly, and finishing with a few final touches, you can achieve a professional-looking finish lasting for years. Remember to take your time, follow these tips, and enjoy the process of bringing new life to your home.

